 We had our work cut-out for us last weekend. The project list looked something like this: weed the garden, mow the lawn, weed eat, edge, trim the pond liner, add protective netting to the pond, re-pot elephant ears, plant new tomato plants, mulch the front gardens, accessorize the upper deck, and plant our new Knock Out® Rose garden.
We decided to document the creation of our new garden with a few photos before, during, and after. We hope you enjoy.
How to create a Knock Out Rose Garden
Step 1: Planning
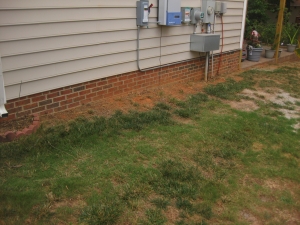 We evaluated the area on the side of our house next to foundation where the utility boxes are. The grass isn’t growing that well and we decided that a garden in this space would complement the new patio.
The area get’s good morning sun and the plants shouldn’t interfere with the utility boxes. It would also accent a side of the house that is primarily a connector between our front and back yards.
We decided to come out about a foot from the foundation and stop where the patio met the back edge of the garage. Why Knock Out Roses? We got our first pair last Fall and they are doing great. They are low maintenance and produce beautiful blooms.
Step 2: Excavate
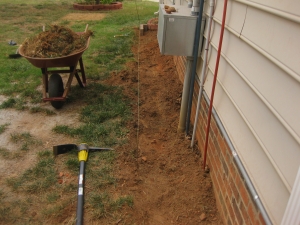 We didn’t want grass coming up in the new garden area. We dug out grass clumps with the pick axe and the shovel (and added everything except a few rocks to our compost pile). The soil was very dry and mostly red clay. Good nutrients, but horrible for planting.
We loosened as much soil as possible and pushed it up against the foundation of the house in preparation for the next step. We were very careful around the utility lines, noting we have two electrical grounds in the area. (Call before you dig if you don’t know where you have buried utility lines.)
Step 3: Line-up
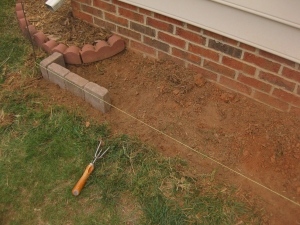 I never used a guide until I started working with patio pavers as my borders. Even if you’re using edging or borders, it’s probably a good idea to work with a straight line. I used some nylon rope (brightly colored) and two bamboo stakes to create a guide.
It goes without saying that your area should be clear and you may need to revisit step 2 (excavating) in case you have any grass or unwanted growth in the garden area.
Step 4: Add a border
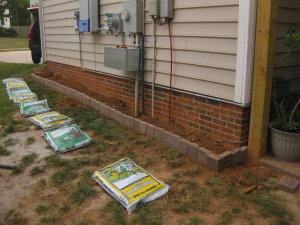 Now things are getting fun. Adding in the border will be one of the defining features of your garden space besides the plants themselves. You have many option to choose from. We decided to use some leftover pavers from the patio project. They are 4″x4″ and complement the existing red scalloped edging and, of course, the patio. I also like how it works well with the brick foundation.
I first used the small garden rake to create the “trench” area where the border would go. I went down the line using the guide and we eyeballed things every few pavers to make sure the border was straight. After the entire border was laid out, I used a mixture of top soil and compost to create a level base for the edging. Then I used a spare brick to “harden” each side of the border–creating a stable base since I didn’t have much depth for this particular garden space.
Step 5: Add soil
Because the red clay is difficult to work with, we imported top soil and compost to mix in with our soil. This made planting much easier. If you are bringing in soil, you’ll want to measure your area and calculate the cubic footage that you’ll need (leave room for mulching). A simple length x height x depth will provide you with surface area and filling capacity.
Step 6: Plant
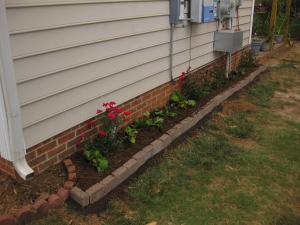 Now that you have your border installed and soil ready, you can layout your plants. We spaced out the Knock Out Roses first, then added Gerber Daisy’s inbetween. Once you’ve planned out where you want your plants, dig your holes and gently put the rootballs in. Fill in the hole, scoop the dirt around the area to the base and press firmly to even out the soil.
Once all the plants were in the ground and we were happy with where they were, we added 2-3 inches of shredded hardward mulch to help retain moisture.
Add water and enjoy the blooms.
